by Prabha Repalle – Lead Consultant
In the following blog, we will provide a brief introduction to:
- Infrastructure as Code (IaC)
- Terraform, its lifecycle, and all core concepts
What is Infrastructure as Code (IaC)?
Infrastructure as Code (IaC) is managing and provisioning the complete IT infrastructure (physical and virtual machines) using machine-readable definition files. It helps in automating the complete data center by using programming scripts.

Popular Infrastructure as Code (IaC) Tools:
- Terraform
- Chef
- Puppet
- Ansible
- Packer
- Vagrant
Each tool has pros and cons; however, Terraform is the most popular and powerful Infrastructure as Code (IaC) tool used by engineers.
What Is Terraform?
Terraform is one of the most popular Infrastructure as Code (IaC) tools used by DevOps teams to automate infrastructure tasks. It automates the provisioning of your cloud resources. Terraform is an open-source, cloud-agnostic provisioning tool developed by HashiCorp.
Benefits of Using Terraform
1. Improved Collaboration
Terraform allows teams to define and manage infrastructure using version control, which makes it easier for multiple people to collaborate and work on the same codebase. This can help improve collaboration and reduce the risk of errors.
2. Version History
Terraform automatically maintains your infrastructure’s version history, making it easy to roll back to previous versions if necessary. This can help protect against mistakes and ensure you can quickly recover from failures.
3. Consistency
Terraform allows you to define your infrastructure using a high-level configuration language, which means that you can specify the desired state of your infrastructure in a consistent and predictable way.
4. Reusability
Terraform allows you to define infrastructure as modular components, which can be easily reused across multiple deployments. This can help reduce duplication and make it easier to manage your infrastructure at scale.
5. Portable Across Cloud Providers
Terraform is portable across different cloud providers, which means that you can use the same tools and processes to manage your infrastructure regardless of where it is deployed.
Terraform Lifecycle
Terraform lifecycle consists of – init, plan, apply, and destroy.

1. Terraform init initializes the (local) Terraform environment. Usually executed only once per session.
2. Terraform plan compares the Terraform state with the as-is state in the cloud and builds and displays an execution plan. This does not change the deployment (read-only).
3. Terraform apply and executes the plan. This potentially changes the deployment.
4. Terraform destroy deletes all resources that are governed by this specific terraform environment.
Terraform Installation
Terraform can be installed on any OS, such as Windows, macOS, Linux, or others. Terraform installation is an easy process.

Terraform Configuration Files
Configuration files are a set of files used to describe infrastructure in Terraform. Terraform uses a declarative model for defining infrastructure. Configuration files let you write a configuration that declares your desired state. Configuration files are made up of resources with settings and values representing the desired state of your infrastructure.

A Terraform configuration is made up of one or more files in a directory, provider binaries, plan files, and state files once Terraform has run the configuration.
1. Configuration file (*.tf files): Declares the provider and resources to be deployed, along with the type of resource and all resource-specific settings.
2. Variable definition files (terraform.tfvars): Assign values to the input variables here.
3. State file (terraform.tfstate): A state file is created once the Terraform is ran. It stores the state about our managed infrastructure.
Getting Started With Terraform
To begin building infrastructure resources using Terraform, there are a few guidelines you should follow. The general steps to deploy a resource(s) in the cloud are:
1. Set up a Cloud Account on any cloud provider (Azure, AWS, GCP, OCI, etc.)
2. Install Terraform
3. Add a provider
4. Initialize Terraform Providers
5. Plan – Dry Run
6. Apply
7. Destroy
To create a VM on Azure using Terraform, please follow the below steps.
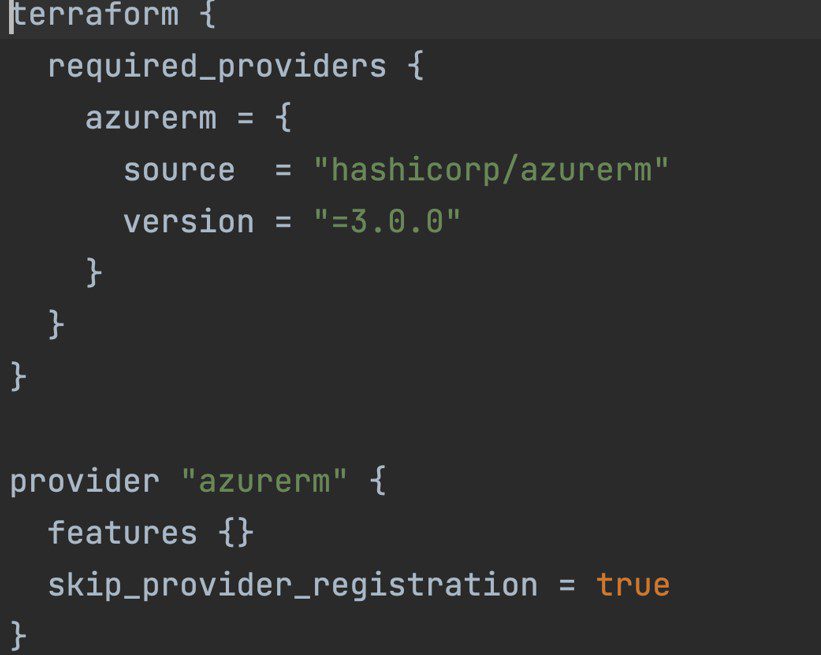
1. Mention the Provider’s Details
2. Create a VNet

3. Create a Private Subnet

4. Create Public Subnet

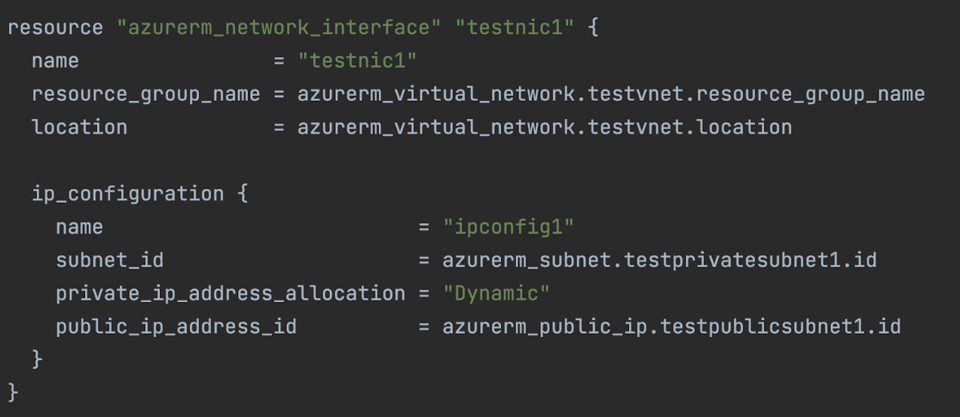
5. Create Network Interface
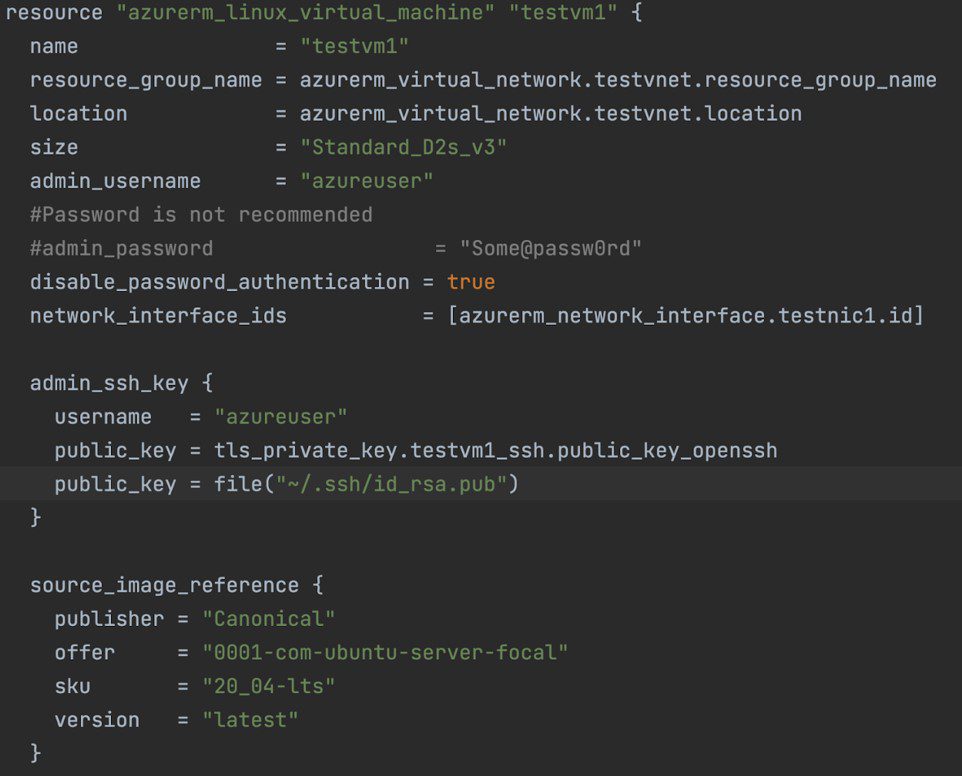
6. Create Virtual Machine

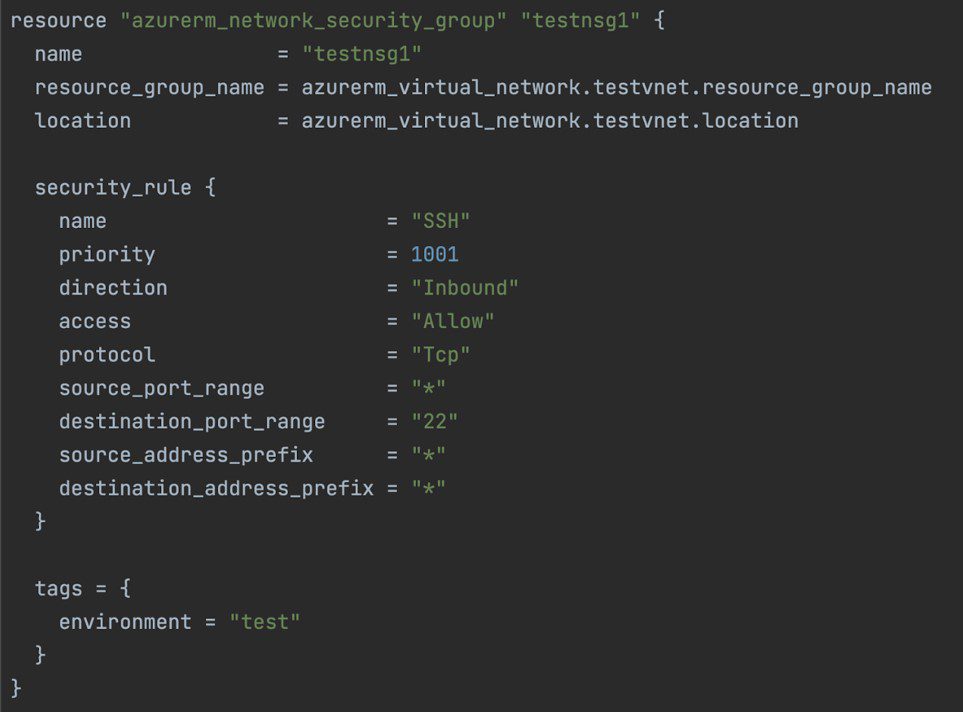
7. Create NSG
8. Associate Network Interface and Network Security Group

To deploy the VM using the YAML file that we created, follow the below steps.
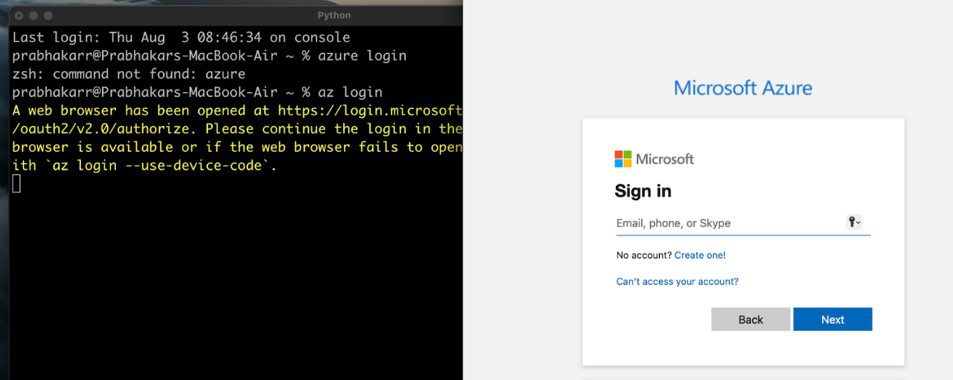
1. Login to Azure
2. Import Resources
3. Dry-run to ensure no erros in the YAML file
Terraform Plan

4. Finally, create the VM using the apply
Terraform Apply


Transform your Infrastructure Environments through Automation
Dive deeper into the power of infrastructure as Code (IaC) and Terraform by contacting the author or our team of experts.
Prabha Repalle – Lead Consultant
Email: [email protected]
LinkedIn: www.linkedin.com/in/prabhakarrepalle/